Discover how neurographic art can be your go-to creative outlet. This simple face and hair exercise is perfect for moms seeking stress relief.
Today, we’re exploring an exercise that is as simple as it is impactful. The best part? Anyone who can hold a pen can do it! Let’s dive into the art of creating a simple face accompanied by neurographic lines as hair—a meditative, creative journey for your mind.
The Benefits of Neurographic Art for Mental Health
Neurographic art is more than just doodling; it’s a practice that has been found to offer profound mental health benefits. Here are some ways it enriches your mind:
- Stress Reduction: The flowing, non-restrictive nature of neurographic art acts like a mental palate cleanser, helping to reduce stress levels as you engage in the activity.
- Enhanced Focus: When you’re rounding off those edges and choosing your colors, you’re in a state of focused attention. This cultivates mindfulness, as you’re fully immersed in what you’re doing, letting go of distractions and intrusive thoughts.
- Boosts Creativity: This practice lets you explore your creative boundaries in a safe, non-judgmental setting. The very act of engaging with colors and shapes can stimulate your creative thinking, leading to a more open and enriched mind.
- Emotional Processing: Believe it or not, your lines can serve as an emotional outlet. Each stroke may represent different feelings or challenges you’re going through. Rounding off the sharp edges can symbolize resolving or coming to terms with these emotions, facilitating better emotional health.
- Improves Self-Esteem: Completing a neurographic art piece, however simple, provides a sense of accomplishment. This small win can boost your self-esteem, fostering a sense of self-worth and competence.
- Encourages Mind-Body Connection: As you move your pen across the paper, you’re engaging both mind and body in a focused activity. This mind-body engagement is a foundational element in holistic well-being.
By dedicating time to neurographic art, you’re not just making something beautiful—you’re practicing a form of self-care that nurtures your mental space.
Have fun with this mindful neurographic art exercise! Please let me know if you’ve tried this one; I would love to see it.
You can find a small video of this exercise on my Instagram @thecreativecooldown

Supplies used:
Bristol paper (Winsor & Newton), alcohol markers (ohuhu), fineliner 0.3, 1.0 (Ohuhu).
Alternative supply suggestions:
You can use any material for this exercise, such as colored pencils, crayons, or a pencil.
Instructions:
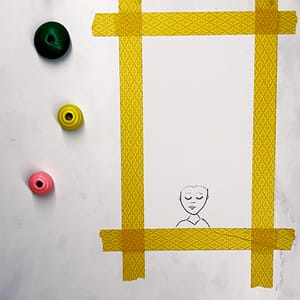
Step 1 – Draw a simple face
Before you start, slowly breathe in and out a few times to clear your head. Then, bring yourself to the present, away from all the day-to-day stress.
Place your pen at the bottom of your paper and draw a basic face.
You can keep it as simple as you like; a face shape, a couple of dots for the eyes, and a line for the mouth is more than enough. Remember, this isn’t about crafting a masterpiece; it’s about setting the groundwork for your creative expression.

Step 2 – Draw freeform lines
Now, let your pen wander from the top of your drawn face to create freeform lines. Imagine these lines as flowing locks of hair, each line representing a different thought or emotion. Let your hand move freely—this is your time to let go.

Step 3 – Rounding off the corners
Once your lines are in place, go back and round off any sharp corners. The act of rounding edges in neurographic art is symbolic of smoothing out the rough patches in our lives, creating a visual representation of emotional harmony.
This is one of my favorite parts of neurographic art – so calming and meditative.

Step 4 – Add color
You can now move on to filling in the sections created by your rounded lines. You might choose to add colors that resonate with you or even incorporate patterns.
I opted for coloring the sections; the choice is yours, and there’s no wrong way to go about it.

Step 5: The finishing touch
You can add some color and details to your face if you like. You can even add colors or patterns to your background. Do what feels good for you.
One of the beauties of this exercise is its accessibility. If you can hold a pen, you can do this. It’s not about your artistic skill level; it’s about the process and what it can do for your mental health.
So there you have it—a simple yet powerful exercise to tap into your creative side and improve your mental well-being. As always, I would love to hear how this exercise worked for you. Did you find the act of rounding off the edges soothing? What colors spoke to you as you filled in the sections?
Feel free to share your experience in the comments, and remember, creativity isn’t about skill; it’s about expressing yourself and caring for your mental well-being.
Take good care, and happy creating!
You might also like my circles and neurographic art exercise if you enjoyed this exercise.