This mindful sunflower lineart exercise will get you in a spring vibe and makes you relax at the same time.
Whohoo, it’s almost spring, I can’t wait. Sunshine always makes me happy.
So for this exercise, I wanted to draw a flower to get in a spring mood. And when I think of the sun, I think of a sunflower!
It may look complicated at first, but it’s not. Just start and try it, I’ll help you through it.
There’s no need to draw a perfectly symmetrical flower (is there even such a thing?). It’s just playing with shapes and filling them with colors and lineart.
In other words, we’ll just experiment and have some fun. The drawing of all the lines and seeds in this drawing will also make you focus and can get you in a nice relaxed, almost meditative, flow.
Please let me know if this sunflower lineart exercise helped you relax, I’d love to know.
If you have any questions about this exercise, please leave a comment below and I’ll help you.
You can find a small video of this exercise on my Instagram @thecreativecooldown

Supplies used:
Bristol paper (Hahnemüle), alcohol markers (Winsor & Newton), fineliner no. 0.1, 0.3, 1.0 (Copic), pencil.
Alternative supply suggestions:
You can use a regular pen or a pencil to draw the lines for this exercise. If you want to add color, use whatever you have, such as crayons, markers, watercolor. Even if you only have a pencil, just try it. You can simulate different colors by using different shades of grey.
If you don’t have fineliners with different-sized tips, you can also use a blunt pencil for thick lines and a sharp one for thinner lines.
Instructions
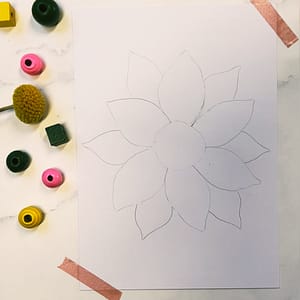
1. Before you start, slowly breathe in and out a few times to get more relaxed. We will start by sketching a simple sunflower. Draw a circle in the middle of your paper. This will be the center of your flower. It doesn’t have to be perfectly round. It’s even better when it isn’t, it will give it a more realistic vibe.
Now it’s time for the petals. I decided to make them quite large, you can also draw lots of smaller ones if you like. Start at the center of your flower and slowly draw a line that curves upwards. Go back to the center and leave a bit of space between the line you just drew. Now curve upwards again and connect your second line with your first. Your petal is sort of egg-shaped with a sharp tip at the end. Make sure your petal is about the same size as your center.
For me, it helped to rotate my page after every petal. That way I always draw the petal at the same angle. Continue drawing your petals until you have petals around your center. Now draw extra petals between the ones you’ve just drawn. These are behind your first circle of petals. Not all your petals have to be the same size and shape. This will make it more playful. So please don’t stress about making them all the same size.

2. Trace your sketch with a larger-tipped fineliner. This will create a nice contrast with the lines you will add with a smaller-tipped pen later. Erase your pencil lines when you’re done and the ink is dry.

3. Add some basic colors to your sunflower. I used basic yellow and brown colors, but you can choose whatever colors you like. It’s your drawing; do what feels good.

4. In order to add some depth, I used some darker shades of the colors I used earlier. I add some darker colors at the base of the petals and to the petals in the second row because they will get some shade from the petals that are in front of them. Since we’ll add lines in step 6, you can be bold with these darker colors. When you think it’s enough, this usually means that you need to add one last layer of these darker colors to your drawing.

5. Now we’ll start by drawing the seeds in the center of your flower. Use a smaller-tipped pen to draw these. Start at the outer edge of your circle and start filling it with lines of small circles. Keep going until your entire circle is filled. Make the circles smaller as you get closer to the middle. Go slow and enjoy the almost meditative motion of drawing these circles.

6. The next step is adding lines to your petals. Grab a smaller-tipped pen for this step. Start at the base of your petal and slowly draw a line to the tip. I always like to start in the middle and then draw the lines on the left and right sides of that. Make sure you follow the curve or your petal. Continue until your petal is filled with lines.

7. Repeat step 6 for all your petals.
Now you have finished the mindful sunflower lineart exercise. Well done!
If you liked this exercise, you might like my Mindful circle lineart exercise as well.