In this mindful dotted cherry blossom exercise, you’ll see that you only need dots to paint these cherry blossoms.
Do you think you can’t paint? Well, I’m sure you can paint this cherry blossom tree. You just need to be able to put some paint on your brush and press it on your paper to make a dot. That’s absolutely doable, right?
Making art with dots is really relaxing because you can play with them and the repetitive motion can get you in a nice flow. It’s about having fun and leaving perfectionism at the door. The latter is not needed here.
So go amaze yourself and paint a cherry blossom!
Have fun with this mindful dotted cherry blossom exercise! Please let me know if you’ve tried this one, I would love to see it.
You can find a small video of this exercise on my Instagram @thecreativecooldown
Supplies used:
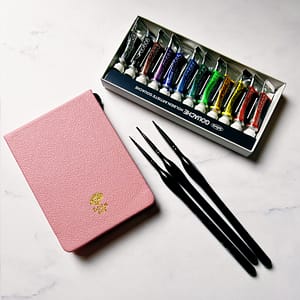
Watercolor paper 300gr (Paul Rubens), gouache (Holbein artists’), fine art miniature brushes (ZenArt), washi tape, jar, palette, paper towel.
Alternative supply suggestions:
You can use your kids’ paints. A lot of these paints are actually gouache.
Of course, you can use crayons, alcohol markers, watercolor, or watercolor pencils as well.
If you only have regular paper, please be aware that your paper cannot hold that much water and will probably warp. Try taping it down to prevent it from warping too much.
Instructions:
Step 1
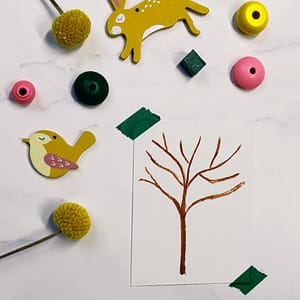
Before you start, breathe slowly in and out a few times to clear your head. Get some brown paint on your brush and slowly paint the trunk of your tree and some branches. It doesn’t have to be perfect. We just need some branches to which we can add our cherry blossom.
Step 2
When you look at a cherry blossom, the flowers closer to the branch are a darker pink than the flowers at the top. The has to do with how much sun the flowers are getting. If you use gouache or crayons, you can start with your darkest pink and start making small dots around your branches. If you use watercolor, you need to start at the top of the branches with the lightest pink you have. Because gouache is opaque, the order is not as important. Watercolor is not opaque, so you always work from light to dark. For the next steps, I’ll describe which steps to take if you use gouache.
Step 3
Grab a bit of your pink from step 2 and add a little white to make it lighter. Make sure that you also save some pink from step 2, you might need it later on. Now add some dots with this lighter tint.

Step 4
Now it’s time to add even more white to your pink from step 3. Add dots with this pink tint to the branches. At the top of the branches the dots should be lighter than closer to the trunk of your tree. This will give your painting some depth.
Step 5
Look at your painting. Are there any empty spots between your branches that you would like to fill with more cherry blossoms? Just repeat steps 2-4 to add some more dotted flowers.
Step 6
If you like, you can add some blades of grass below your tree. I used different shades of green to draw my grass. Get some green on your brush and add some vertical lines. Repeat this with different shades of green.
Well done! You’ve just finished this mindful dotted cherry blossom exercise. Were you surprised by your result? Told you you could do it 🙂
If you liked this exercise, you might like my mindful leopard spot pattern exercise as well.


