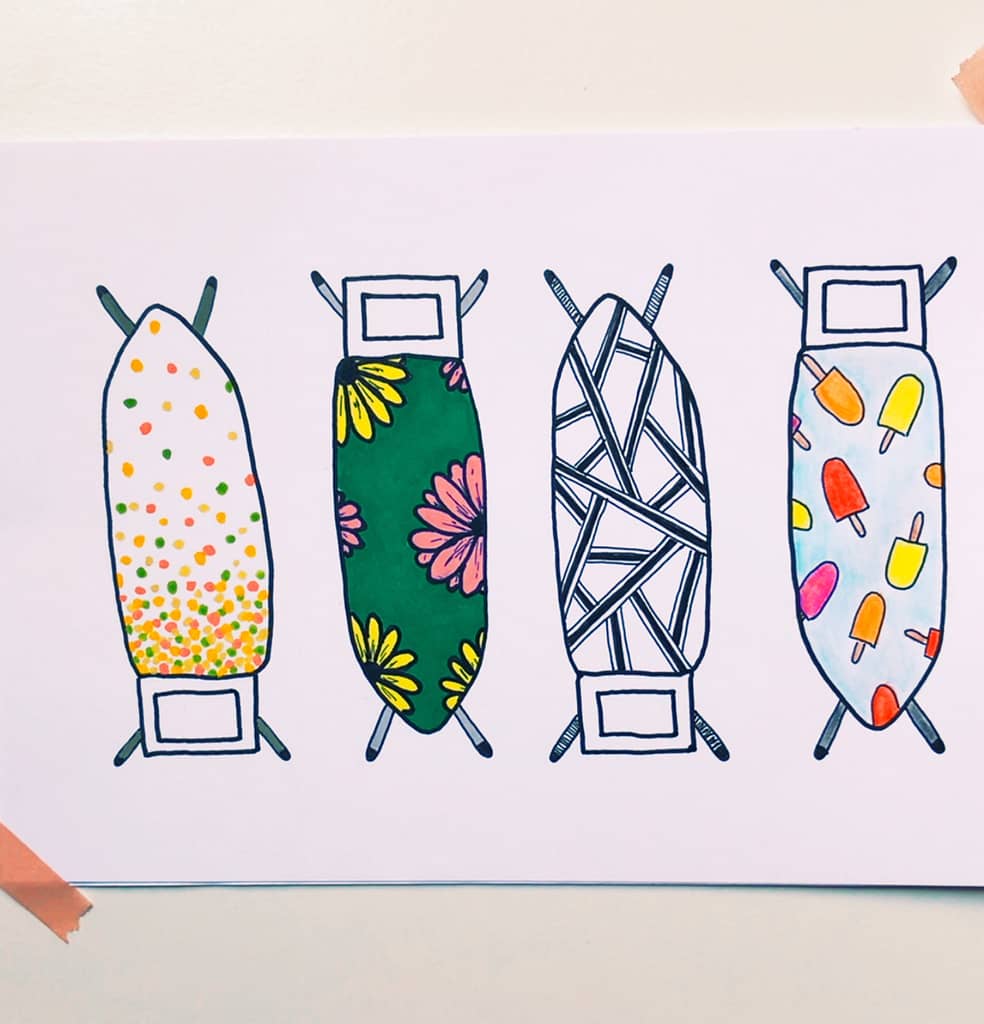
In the afternoon I was in my attic staring at my ironing board and I suddenly got inspired. Why not do an exercise designing ironing board covers?
I’ve never really paid any attention to our own cover. We always just keep the cover that comes with the board. But now I was intrigued and I started to really look at it. It is filled with small dots in different colors and it looks like they are falling and the dots are all gathered at the bottom of the board.
Have you ever paid attention to your ironing board cover?
The first cover in the images below is actually inspired by our own ironing board. I thought it would be fun to recreate it in this exercise.
Just let your mind wander and think of fun designs for your ironing board covers. Maybe you want to recreate your own as well or you’ll design your dream cover.
You can use whatever supplies you have. No fancy supplies necessary. You can even use scraps of paper to fill your cover. Just do what feels good and inspires you.
The most important thing is to have a good time! Let me know if you have tried this exercise, I’d love to know how your ironing board covers turned out.
If you want to see a short video about this exercise, please check out my instagram @thecreativecooldown
Supplies used:
Winsor and Newton Bristol paper (A5). Winsor and Newton promarkers. Copic multiliner 0.3 and 1.0. Winsor and Newton watercolor pencils. Holbein Artists’ Gouache.
Alternative supply suggestions:
You can use any scrap of paper that you have lying around, such as the margins of a newspaper, a magazine, the back of a grocery list. Please keep in mind that if you are using alcohol makers, you do need special paper, such as marker paper or bristol paper.
Instead of a fineliner, a pencil or a regular pen is fine as well. If you want to add colors, just use what you have (crayons, watercolor, markers, colored pencils) or use a pencil to add various grey tones.
Instructions:
1. Draw some ironing boards. These can be simple, but you can make them as detailed as you like. But a basic cover shape is enough for this exercise (sort of a rectangle with a pointy end, like a pencil).
2. Design your own cover. Let your creativity and fantasy flow and fill them with whatever you’d like. If it is possible it is also relaxing to use different materials for each cover. It is always fun to experiment!
If you liked this exercise, maybe you’d like this one as well: Mindful fill the jars exercise
