Discover the therapeutic power of squiggly lines! Dive into art therapy designed for us busy moms. Unwind and unleash your creativity today!
Are you ready to inject a bit of playfulness into your creative routine? Dive into the world of squiggly lines with this fun exercise! In this blog, we’ll explore how to create vibrant and dynamic artwork that will calm your mind and put a smile on your face.
Benefits of the Squiggly Lines Exercise
- Stress Relief: Engaging in creative activities like drawing can help reduce stress and promote relaxation, allowing you to unwind and recharge.
- Mindfulness: You can cultivate mindfulness and presence by focusing on the present moment and the movements of your hand as you draw these squiggly lines.
- Self-Expression: Express yourself freely through your artwork, allowing your unique personality and emotions to shine through each squiggle and stroke.
- Playfulness: Embrace your inner child and enjoy the process of creating without worrying about perfection. Let go of expectations and allow yourself to play and explore.
- Creative Exploration: Experiment with different techniques, colors, and compositions, allowing yourself to discover new possibilities and expand your artistic horizons.
Have fun with this simple art therapy exercise using squiggly lines! Please let me know if you’ve tried it; I would love to see it.
You can find a small video of this exercise on my Instagram @thecreativecooldown

Supplies used:
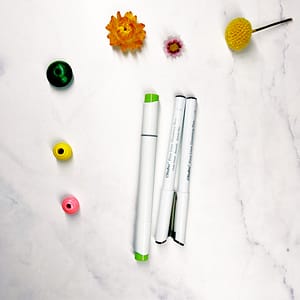
Bristol paper (BeCreativeShop), Alcohol markers (Ohuhu), fineliner 1.0, 0.3 (Ohuhu).
Alternative supply suggestions:
You can use any supplies you have: colored pencils, crayons, watercolors, etc.
Instructions for this calming art therapy exercise:
Step 1 – Start with wavy vertical lines
Before you start, slowly breathe in and out a few times to clear your head. Then, bring yourself to the present, away from all the day-to-day stress.
Grab your favorite paper and drawing tools—it’s time to let your creativity flow! Start by drawing two vertical squiggly lines at the 1/3 and 2/3 marks of your page. These will serve as the anchors for your composition.
Step 2 – Creating sections
Fill the middle section between the squiggly lines with more squiggles, creating playful sections across your page. Don’t overthink it, and follow the direction your hand takes you.
Step 3 – Add more squiggly sections
For added interest, divide some of these sections into smaller areas with additional squiggly lines.
Step 4: Add color
Now, it’s time to bring your drawing to life! Select your favorite colors and fill in the sections that aren’t divided with vibrant colors. You can let your imagination run wild as you experiment with different color combinations or just pick one color, as I did. It’s up to you.
Step 5: Add horizontal lines
Before we move on to the left and right sides of your page, you can trace the outlines of the larger sections with a thick pen to make them stand out even more.
Then, you fill the left and right sides of your page with horizontal lines, creating a balanced composition. I love the squiggly lines’ playfulness and the horizontal lines’ calmness together.
Step 6: Add depth
To add depth and dimension to your artwork, consider adding shadow lines. If you want the middle section to appear on top, add shadows on the outside of your squiggly lines. For a sunken effect, add shadows on the inside of the vertical squiggly lines.
Ready to embark on your squiggly lines adventure? Set aside some time for creative play and see where your imagination takes you. Remember, the journey is just as important as the destination, so enjoy every squiggle along the way!
You might also like my playful tree drawing exercise if you enjoyed this exercise.
