In this mindful ‘happy holidays’ exercise, we will paint and decorate the letters of the word ‘holidays’.
I’ve always loved to blend colors with watercolor and that is exactly what we’ll be doing in this exercise. We will try to give the letters an ‘icy’ feel.
Don’t worry if your letters are not perfectly shaped or consistent. Mine aren’t either. Just enjoy the little things; watching your colors blend, listening to the tinkling sound of your paintbrush in the water, thinking of fun things to decorate your letters with.
Have fun with this mindful happy holidays exercise! Please let me know if you liked this one.
You can find a small video of this exercise on my Instagram @thecreativecooldown

Supplies used:
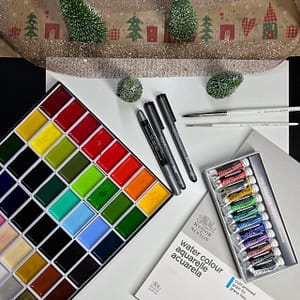
Watercolor paper 300gr (Winsor & Newton), watercolor (Kuretake Gansai Tambi), paintbrushes (da Vinci), fineliners (Copic), gouache (Holbein artists’), metallic jewel brush pen (Kelly Creates), white acrylic marker (Posca), pencil, washi tape, palette, jar, paper towel.
Alternative supply suggestions:
You can use your kids’ watercolor paints. They may not have as much pigment as the ones in the art stores, but it’s definitely something you can start with at the beginning.
Know that a lot of opaque children’s paint is actually gouache. So you can use that as well.
However, it is also possible to do this exercise with colored pencils, crayons, or alcohol markers. Use what you have.
If you only have regular paper, please be aware that your paper cannot hold that much water and will probably warp. Try taping it down to prevent it from warping too much.
Instructions:
1. The first step is to write the word ‘holidays’ on your paper with a pencil. I used regular block letters, but you can use faux calligraphy or any other style as well. As long as you make sure the letters are thick enough to fill with paint later. You can already add some decorations or holiday doodles to your letters or you can add them at step 4.
2. Paint the top half of your letters in a light, almost pale, blue. Make sure it’s not too dry, so it can blend easily with the color we will add to the bottom half.
3. Now, we can paint the bottom half in a dark blue color. Slowly touch the light blue color with the dark blue and let them blend together. If the top part is already dry, use a bit of water to blend them together.
4. After we’ve painted our letters, it’s time to decorate them. Look at your letterforms and imagine what kind of decoration or doodle you can add to make them more festive. I already sketched my decorations in step 1 and painted around them, which means that I could use watercolor for most of my doodles. If you need to paint over it, use something that’s opaque, such as gouache, acrylic paint, or acrylic markers. It’s difficult to paint over watercolor, that’s only possible if you use a darker color. I decided to add some snow, a hat, a scarf, a sleigh, baubles, and lights.
5. When you’re done with your decorations, I always like to outline my letters with a fineliner. This makes them pop more. Of course, this is totally optional.
6. Add the word ‘happy’ above the word ‘holidays’ and you have created your own seasonal greeting! And now you’re done with this mindful happy holidays exercise.
If you liked this exercise, you might like my apple chestnut watercolor exercise as well.

